Die vorliegende Übersetzung wurde maschinell erstellt. Im Falle eines Konflikts oder eines Widerspruchs zwischen dieser übersetzten Fassung und der englischen Fassung (einschließlich infolge von Verzögerungen bei der Übersetzung) ist die englische Fassung maßgeblich.
Registrierung für ein AWS-Konto
Voraussetzungen für die Erstellung eines neuen AWS-Kontos
Um sich für ein AWS-Konto zu registrieren, müssen Sie die folgenden Informationen angeben:
-
E-Mail-Adresse des Root-Benutzers — Die E-Mail-Adresse wird als Anmeldename für den Root-Benutzer verwendet und ist für die Kontowiederherstellung erforderlich. Sie müssen in der Lage sein, E-Mail-Nachrichten zu empfangen, die an diese Adresse gesendet werden. Bevor Sie bestimmte Aufgaben ausführen können, müssen Sie sicherstellen, dass Sie Zugriff auf E-Mails haben, die an diese Adresse gesendet wurden.
-
AWS-Kontoname — Der Name des Kontos erscheint an verschiedenen Stellen, z. B. auf Ihrer Rechnung und in Konsolen wie dem Billing and Cost Management-Dashboard und der AWS Organizations-Konsole. Wir empfehlen Ihnen, eine Standardmethode für die Benennung Ihrer Konten zu verwenden, damit Sie Ihren Konten Namen geben können, die leicht zu erkennen sind. Erwägen Sie, für Unternehmenskonten einen Benennungsstandard wie organization-purpose-environment (zum Beispiel AnyCompany-audit-prod) zu verwenden. Für Privatkonten sollten Sie erwägen, einen Benennungsstandard wie Vorname-Nachname-Verwendungszweck zu verwenden (z. B.). paulo-santos-testaccount
-
Adresse — Ihr vollständiger Name und Ihre Adresse.
-
Telefonnummer — Diese Nummer wird zur Identitätsprüfung und zur Bestätigung der Inhaberschaft Ihres Kontos verwendet. Sie müssen in der Lage sein, unter dieser Telefonnummer Anrufe und SMS-Nachrichten zu empfangen.
Erstelle dein Konto
-
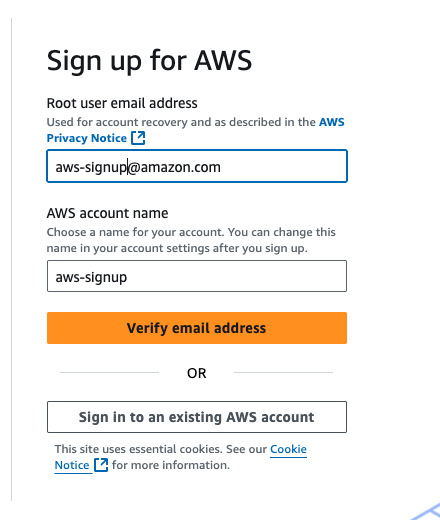
Öffnen Sie die Seite „Bei AWS anmelden
“. -
Geben Sie die E-Mail-Adresse des Root-Benutzers und den AWS-Kontonamen ein und wählen Sie dann E-Mail-Adresse verifizieren aus. Dadurch wird ein Bestätigungscode an Ihre angegebene E-Mail-Adresse gesendet.
Wichtig
Wenn dieses Konto für ein Unternehmen bestimmt ist, verwenden Sie eine sichere Unternehmensverteilerliste (z. B. it.admins@example.com
), damit Ihr Unternehmen auch dann Zugriff auf das AWS-Konto hat, wenn ein Mitarbeiter die Position wechselt oder das Unternehmen verlässt. Da die E-Mail-Adresse zum Zurücksetzen der Root-Benutzeranmeldedaten des Kontos verwendet werden kann, sollten Sie den Zugriff auf diese Verteilerliste oder Adresse schützen. -
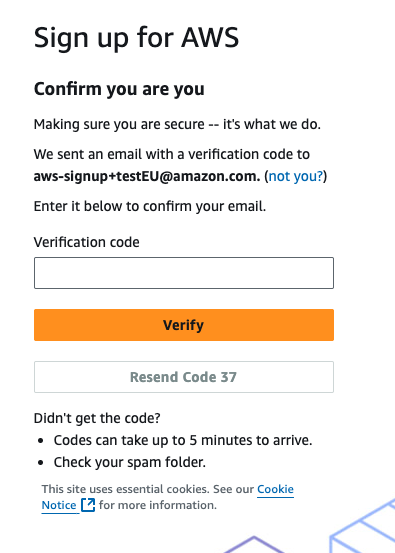
Geben Sie Ihren Bestätigungscode ein und wählen Sie dann Verifizieren aus.
-
Geben Sie ein sicheres Passwort für Ihren Root-Benutzer ein, bestätigen Sie es und wählen Sie dann Weiter. AWS verlangt, dass Ihr Passwort die folgenden Bedingungen erfüllt:
-
Es muss mindestens 8 Zeichen und maximal 128 Zeichen lang sein.
-
Es muss mindestens drei der folgenden Zeichentypen enthalten: Großbuchstaben, Kleinbuchstaben, Zahlen und
! @ # $ % ^ & * () <> [] {} | _+-=Symbole. -
Es darf nicht mit Ihrem AWS-Kontonamen oder Ihrer E-Mail-Adresse identisch sein.
-
-
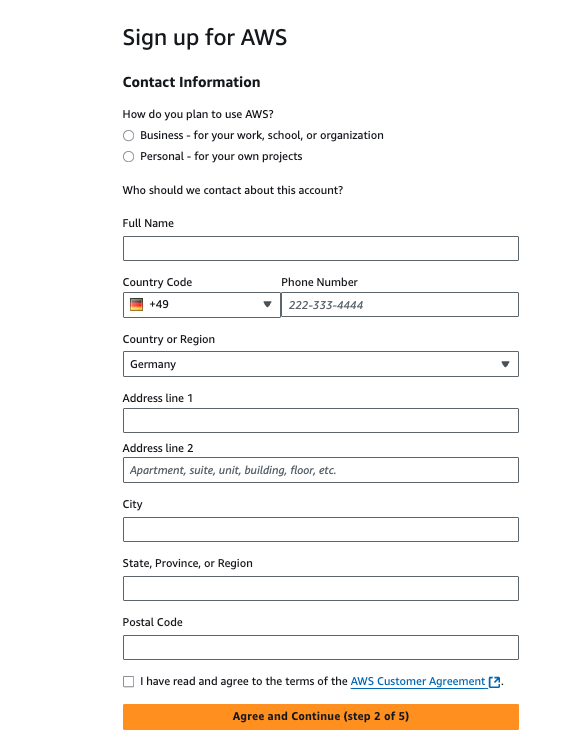
Wählen Sie Geschäftlich oder Persönlich. Privatkonten und Geschäftskonten haben dieselben Merkmale und Funktionen. Geben Sie Ihre Unternehmens- oder persönlichen Daten ein.
Wichtig
Für AWS-Geschäftskonten empfiehlt es sich, eine Unternehmenstelefonnummer anstelle einer Nummer für ein Privattelefon einzugeben. Wenn Sie den Root-Benutzer des Kontos mit einer individuellen E-Mail-Adresse oder einer persönlichen Telefonnummer konfigurieren, kann Ihr Konto unsicher werden. Lesen und akzeptieren Sie die AWS-Kundenvereinbarung. Stellen Sie sicher, dass Sie die Bedingungen der AWS-Kundenvereinbarung gelesen und verstanden haben.
-
Wählen Sie Zustimmen und Fortfahren. Zu diesem Zeitpunkt erhalten Sie eine E-Mail-Nachricht, um zu bestätigen, dass Ihr AWS-Konto einsatzbereit ist. Sie können sich mit der E-Mail-Adresse und dem Passwort, die Sie bei der Registrierung angegeben haben, bei Ihrem neuen Konto anmelden. Sie können jedoch keine AWS-Services nutzen, bis Sie Ihr Konto aktiviert haben.
-
Geben Sie die Informationen zu Ihrer Zahlungsmethode ein und wählen Sie dann Verifizieren und Fortfahren. Wenn Sie eine andere Rechnungsadresse für Ihre AWS-Rechnungsinformationen verwenden möchten, wählen Sie Neue Adresse verwenden aus. Sie können mit dem Anmeldevorgang erst fortfahren, wenn Sie eine gültige Zahlungsmethode hinzugefügt haben.

-
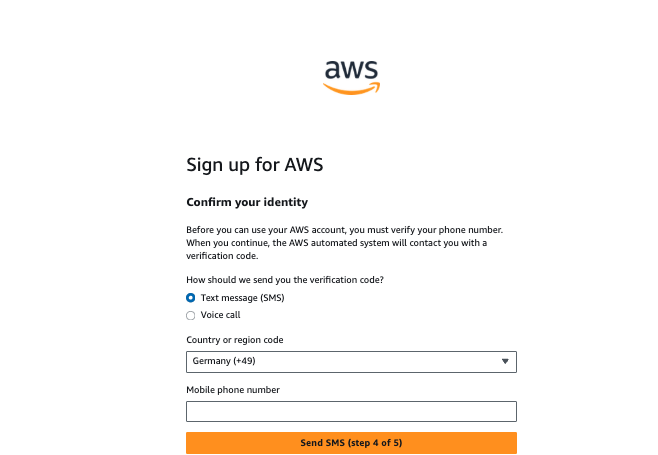
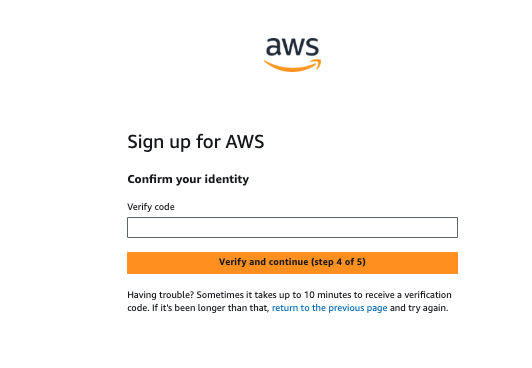
Geben Sie Ihren Landes- oder Regionalcode aus der Liste ein und geben Sie dann eine Telefonnummer ein, unter der Sie in den nächsten Minuten erreichbar sind.
-
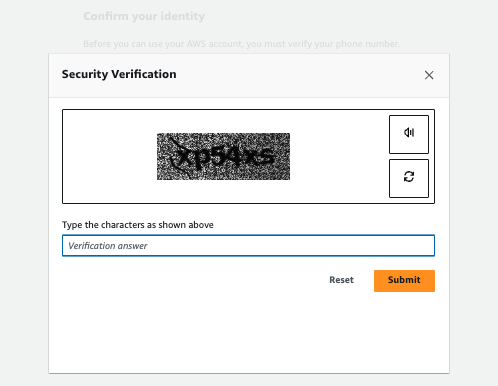
Geben Sie den im CAPTCHA angezeigten Code ein und senden Sie ihn ab.
-
Wenn das automatisierte System Sie kontaktiert, geben Sie die PIN ein, die Sie erhalten haben, und senden Sie sie dann ab.
-
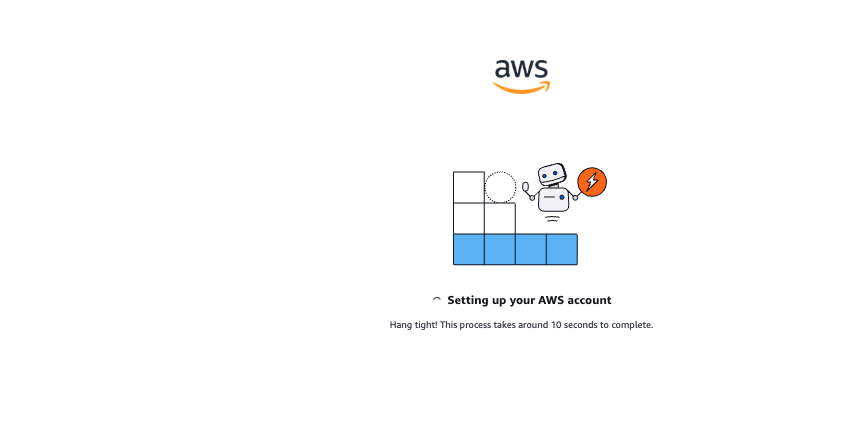
Nach der Überprüfung wird die Seite zur Einrichtung Ihres AWS-Kontos angezeigt, die darauf hinweist, dass Ihr Konto aktiviert wird, und Sie werden zur Konsole weitergeleitet.
-
Suchen Sie in Ihrem E-Mail- und Spam-Ordner nach einer E-Mail-Nachricht, die bestätigt, dass Ihr Konto aktiviert wurde. Die Aktivierung dauert normalerweise einige Minuten, kann aber manchmal bis zu 24 Stunden dauern.
-
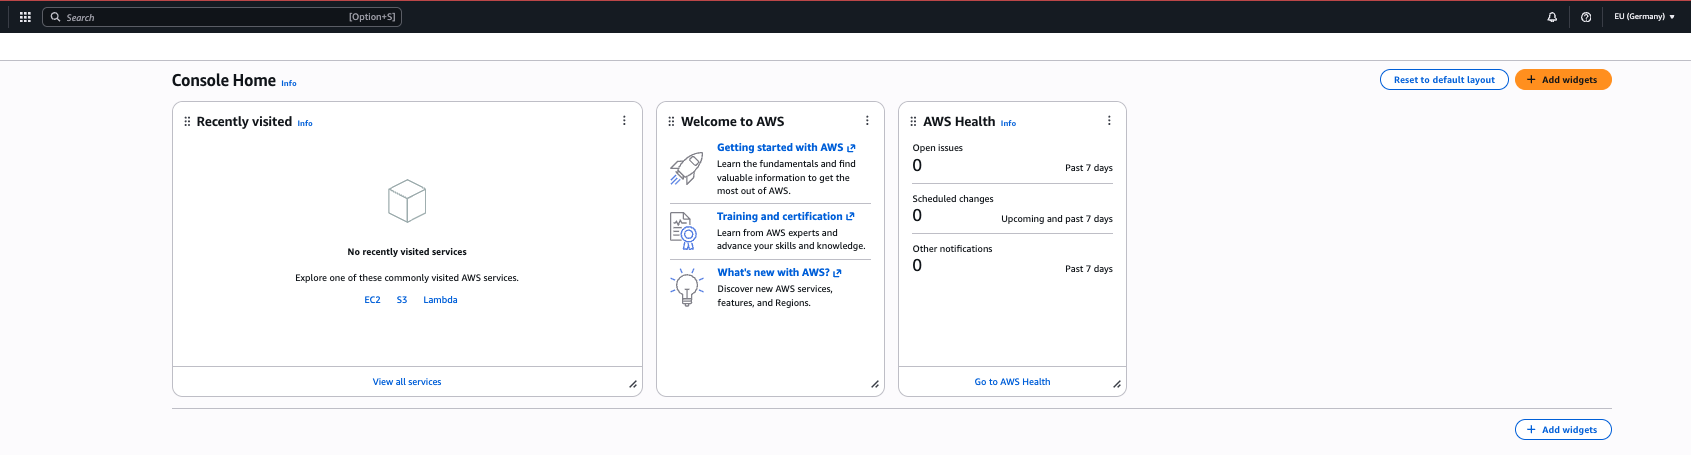
Nachdem Sie die Aktivierungsnachricht erhalten haben, können Sie sich bei der AWS-Managementkonsole
anmelden, um AWS-Services zu nutzen.
