Creating an CloudFormation Template Project in Visual Studio
To create a template project
-
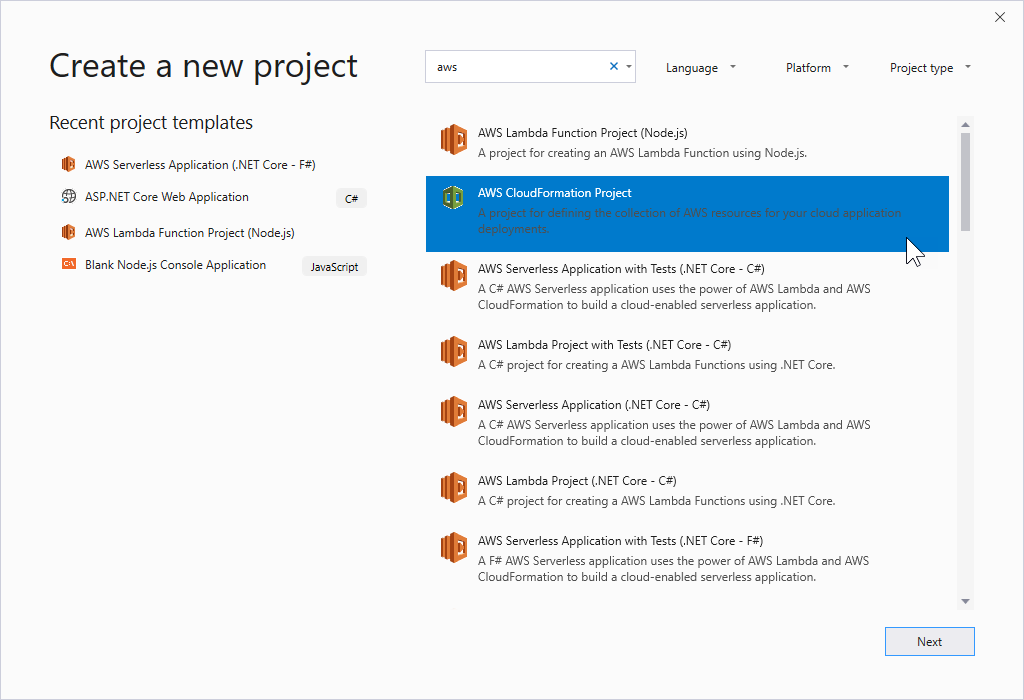
In Visual Studio, choose File, choose New, and then choose Project.
-
For Visual Studio 2017:
In the New Project dialog box, expand Installed and select AWS.

For Visual Studio 2019:
In the New Project dialog box, ensure that the Language, Platform, and Project type drop-down boxes are set to "All ..." and type aws in the Search field.
-
Select the AWS CloudFormation Project template.
-
For Visual Studio 2017:
Enter the desired Name, Location, etc., for your template project, and then click OK.
For Visual Studio 2019:
Click Next. In the next dialog, enter the desired Name, Location, etc., for your template project, and then click Create.
-
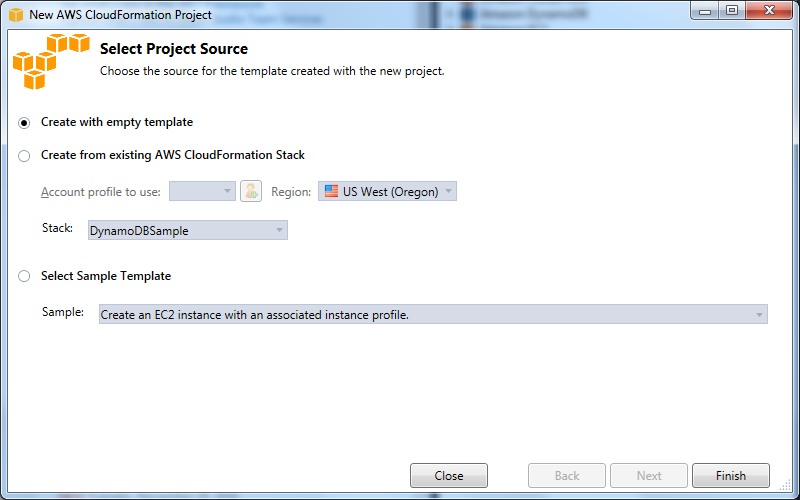
On the Select Project Source page, choose the source of the template you will create:
-
Create with empty template generates a new, empty CloudFormation template.
-
Create from existing AWS |CFN| stack generates a template from an existing stack in your AWS account. (The stack doesn't need to have a status of
CREATE_COMPLETE.) -
Select sample template generates a template from one of the CloudFormation sample templates.
-
-
To complete the creation of your CloudFormation template project, choose Finish.